 ESPectre
Build your Home Assistant dashboard
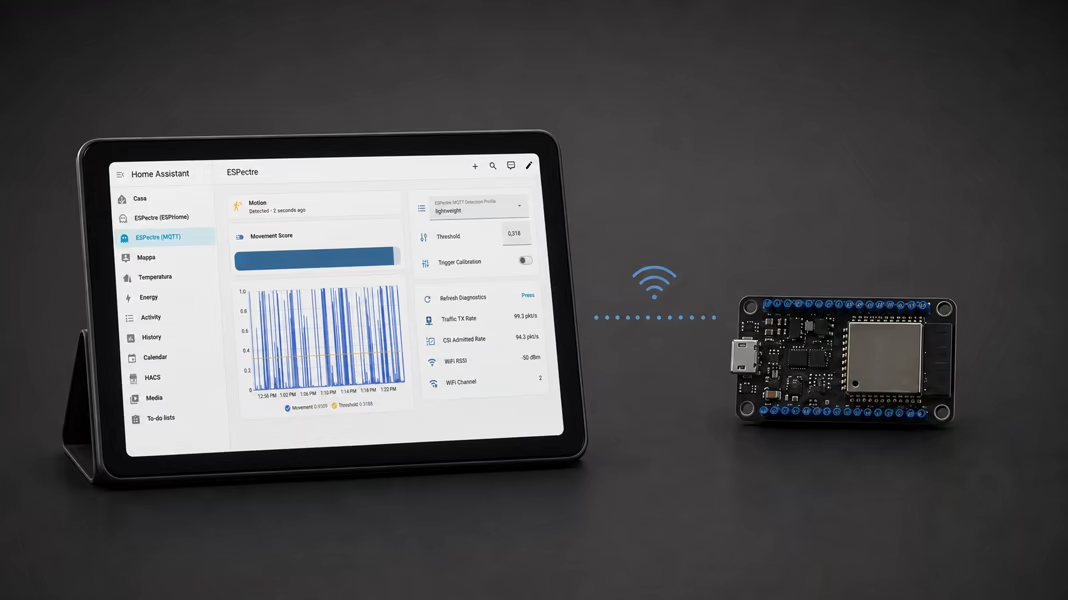
Build a dashboard for motion, movement history, and sensor controls. Optionally, add the traffic generator app to send traffic to your sensors from Home Assistant.
Sections
Before you start
- Your ESPectre device is in Home Assistant through ESPHome or MQTT (Native firmware). Micro-ESPectre does not work with Home Assistant.
- The device appears under Settings → Devices & services, and its Motion Detected and Movement Score entities show values.
- You are a Home Assistant administrator, which is needed to create dashboards.
Step 1 — Find your entity IDs
The dashboard template starts from entity IDs with the prefix espectre_. Official ESPHome images add the last three MAC bytes, so that prefix becomes espectre_a1b2c3_ and every espectre_ in the template has to change. A custom or older ESPHome device still named espectre can keep the template as it is. With MQTT, Home Assistant creates each entity ID the first time it sees the entity, and keeps any later renames; see Naming of MQTT entities.
Open the entity list
Go to Settings → Devices & services → Entities, then filter for your ESPectre device.
Identify the active entities
Open Movement Score, check that it belongs to the right device and shows a value, and copy its full entity ID.
Check whether one prefix is enough
If the ID ends in
movement_score, the part before it is the prefix for the whole template. If it ends in something likemovement_score_2, you have to check and replace each entity ID on the dashboard one by one.
| Situation | Movement Score example | Dashboard change |
|---|---|---|
| Official ESPHome image | sensor.espectre_a1b2c3_movement_score | Replace espectre_ with espectre_a1b2c3_ |
ESPHome name espectre, without a MAC suffix | sensor.espectre_movement_score | No prefix change |
| Default Native device name | sensor.espectre_c3_f61093_movement_score | Replace espectre_ with espectre_c3_f61093_ |
| Entity-ID collision | sensor.espectre_c3_f61093_movement_score_2 | Replace each affected complete entity ID |
These are only examples: the chip, device ID, device name, renames, and older entities all change the final ID, so always copy it from Home Assistant. If you see both an entity and an _2 copy, Home Assistant has two entities that wanted the same ID. The suffix is not part of the prefix and can differ between entities; use only the entities of the device that is online now.
Troubleshooting: recreate duplicate MQTT entity IDs
Use this only with MQTT (Native firmware), when old entities keep causing _2 IDs. Dashboards and history use entity IDs, so write down the current IDs and back up the dashboard first.
Keep only one publisher
Turn off every old ESPectre device with the same identity. Keep the device you want to use off too, until the cleanup is done.
Find this device's discovery topics
With an MQTT client such as MQTT Explorer, look at the retained topics
homeassistant/<component>/<object-id>/config. Check the device identifier, device name, andunique_idin each message to find the ones for your device.Remove only the matching configurations
Publish an empty retained message to each of those topics. Home Assistant then removes the entity; wait for the old entities to disappear. Do not clear
homeassistant/#or other devices' topics.Publish one clean entity set
Turn the device back on. It announces itself again, and Home Assistant recreates the entities, now without
_2.Verify before editing the dashboard
Check that every new entity belongs to the right device, shows a value, and has the expected prefix. Then update the dashboard with those IDs.
Step 2 — Create an empty dashboard
Add the dashboard
Go to Settings → Dashboards, select Add dashboard, and choose New dashboard from scratch.
Name it
Use a name such as ESPectre, choose whether to show it in the sidebar, and select Create.
Take control
Open the new dashboard and select the edit button. If Home Assistant asks, use the three-dot menu to take control. The template uses the Sections view.
See also Home Assistant's dashboard guide and Sections view reference.
Step 3 — Paste the template
Copy the YAML
Open the ESPectre dashboard template, select Raw, and copy all of it.
Open the raw editor
In the dashboard editor, open the three-dot menu, select Raw configuration editor, replace everything with the copied YAML, and save.
Replace the prefix
If your prefix from Step 1 is not
espectre_, replace everyespectre_with it, and save again.Fix numbered IDs
If an entity ends in
_2or another number, replace its full ID on its dashboard row. Do not add the number to the prefix.
binary_sensor, Movement Score stays sensor, Threshold stays number, Recalibrate stays button, and so on.Step 4 — Verify the result
The first column shows motion, a Movement Score bar, and the last 30 minutes of movement against the threshold. The second column has the detection controls and the most useful diagnostics for installation.
- Move in the room: Motion should change and Movement Score should update.
- The Threshold line should appear in the graph once the device has sent its value.
- Select Refresh Diagnostics to fill in Generator Rate, Traffic TX Rate, Traffic RX Rate, CSI Admitted Rate, WiFi RSSI, and WiFi Channel. They update only when you ask.
- Press Recalibrate only when the room can stay still. Calibration Active stays on while Lightweight calibration is running.
Optional — Run the traffic generator app
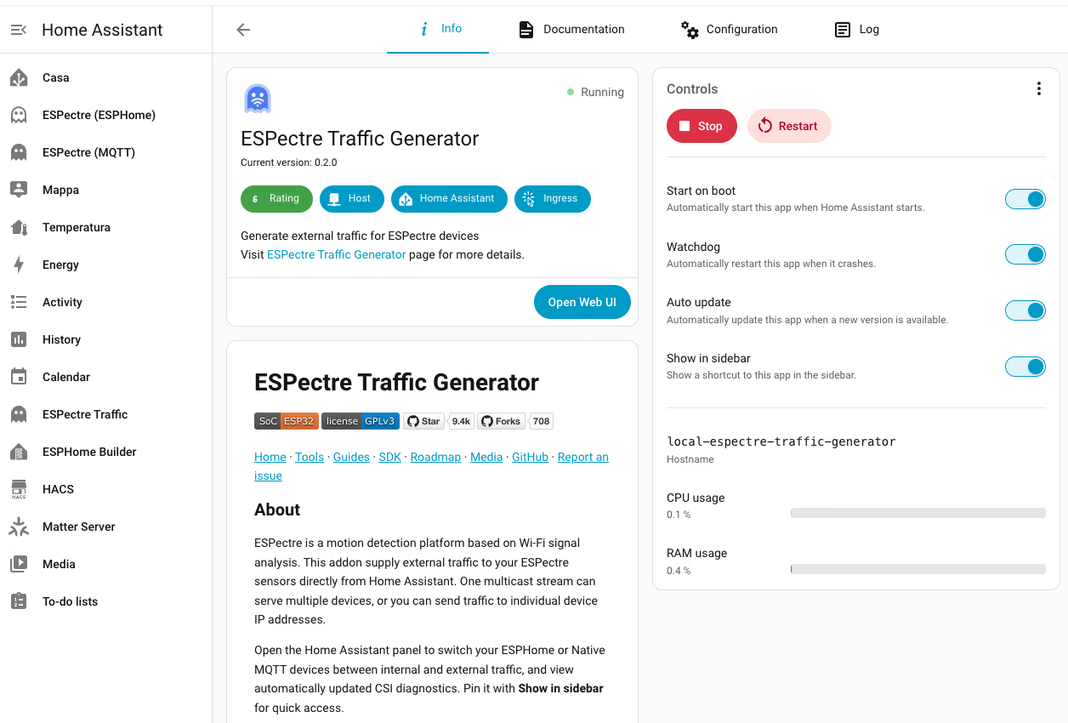
The ESPectre Traffic Generator is a Home Assistant app (formerly called an add-on) that sends a steady stream of packets from Home Assistant to your sensors. In external mode, several sensors share one multicast stream instead of each sending its own requests to the router. Its sidebar panel switches ESPHome and Native MQTT devices between their own (internal) traffic and this external traffic. You don't need the dashboard above to use it.
You need 64-bit Home Assistant OS (aarch64 or amd64), an administrator account, Internet access for the installation, and ESPectre 3.0 firmware (prereleases included). Home Assistant must reach the devices on UDP port 5555. Container, Core, Supervised, and 32-bit installations are not supported.
Install and start the app
Add the repository
Open Settings → Apps → Install app, then select ⋮ → Repositories. Add
https://github.com/francescopace/espectreand close the dialog.Install ESPectre Traffic Generator
Search for the app and select Install. If it does not appear, select ⋮ → Check for updates. The first installation can take a few minutes.
Start it with the defaults
Check Configuration against the settings below. On Info, enable Start on boot and Watchdog, and select Start. Enable Show in sidebar, or select Open Web UI.
Check the traffic settings
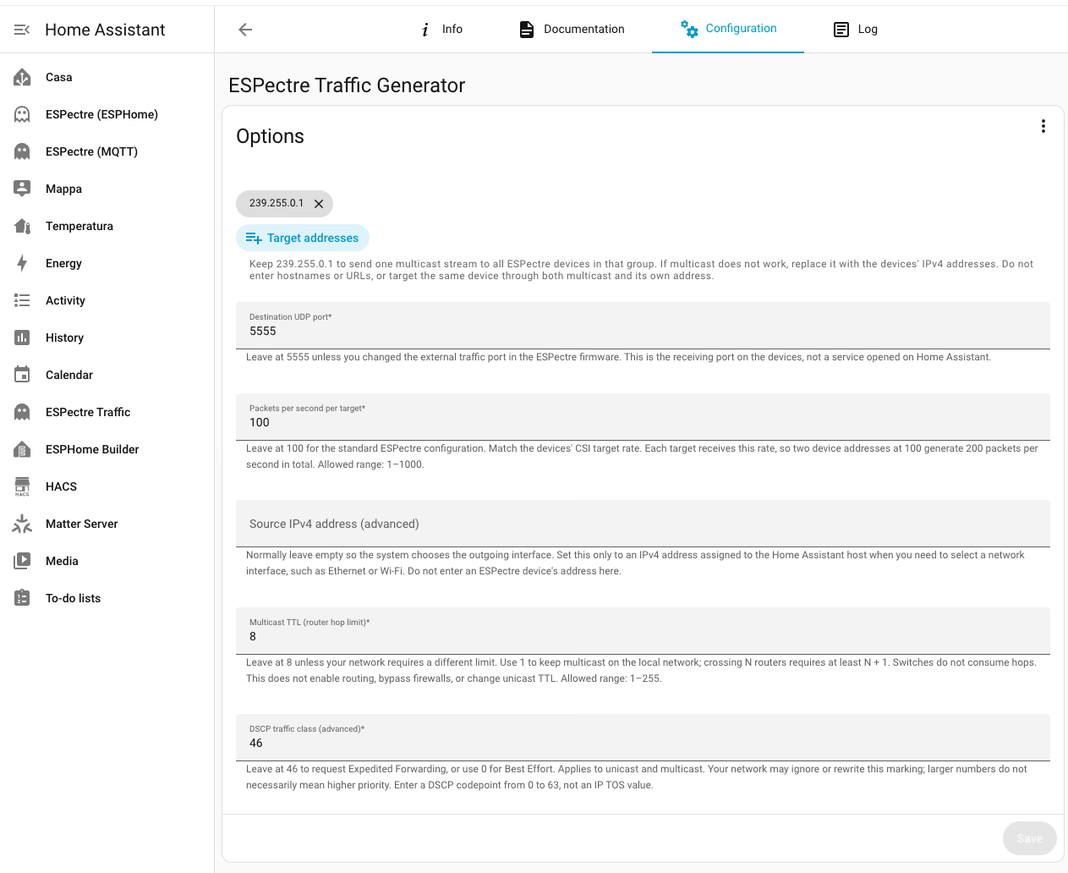
For a first test, keep Target addresses at 239.255.0.1, the UDP port at 5555, and the rate at 100 packets per second per target. Leave Source IPv4 address empty. The address, port, and rate must match the devices' external traffic settings; the app does not change them.
If multicast does not reach your sensors, list their IPv4 addresses instead, and reserve those addresses in your router. Never send to a sensor both by multicast and by its IP, or from two generators at once. Save and restart the app after changing options.
Switch devices to external traffic
Find your devices
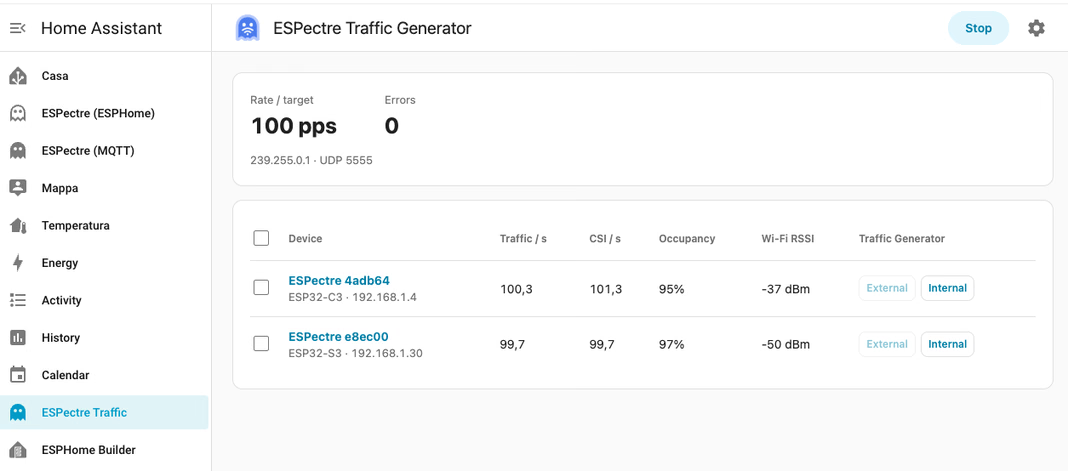
Open ESPectre Traffic. The panel lists the devices already in Home Assistant through ESPHome or MQTT. If a device or its controls are missing, check the integration and enable its traffic entities under Settings → Devices & services → Entities.
Select External
Select External on a device, or select several devices and use the button above the table, then confirm. External mode survives restarts; Internal switches the device back to its own traffic.
Verify reception and sensing
Check RX / s, CSI / s, and Occupancy; the panel refreshes them while it is open. Generator / s is zero in external mode, and TX / s and RX / s count all the device's network traffic. Occupancy here means how much valid CSI the detector receives. Wait until calibration is done, in the device's entities or Live motion, then walk through the room and check Motion Detected.
Troubleshooting
Home Assistant does not find the device (MQTT)
- Check the broker address, port, and credentials in Device settings.
- Check that Home Assistant and the device use the same broker.
- Connect with Live motion and open its Diagnostics section to check the device. The discovery messages should also appear on the broker under
homeassistant/.
Cards show “Entity not available”
- Compare each entity ID with Settings → Devices & services → Entities.
- Replace the prefix, including its final underscore, then fix any numbered IDs one by one.
- Remove rows for entities your firmware does not have.
Diagnostics are stale
- Select Refresh Diagnostics: these entities update only on request.
- Wait a moment for the new values.
- When checking placement, look at Generator Rate, Traffic RX Rate, CSI Admitted Rate, and RSSI together.